Hodgkin-Huxley Neuron Builder
Overview
The Hodgkin-Huxley Neuron Builder is a web-application that allows the user to interactively go through the entire cell model building pipeline. The workflow consists of three steps: 1) electrophysiological feature extraction from voltage traces; 2) model parameter optimization; 3) in silico experiments using the optimized model cell.
The user is provided with a friendly interface enabling to interact with both the HBP Collaboratory storage and the High Performance Computing (HPC) resources. The application has been built in a flexible way to allow the user to enter the workflow at any desired step, by either interacting with HBP resources or uploading his own files.
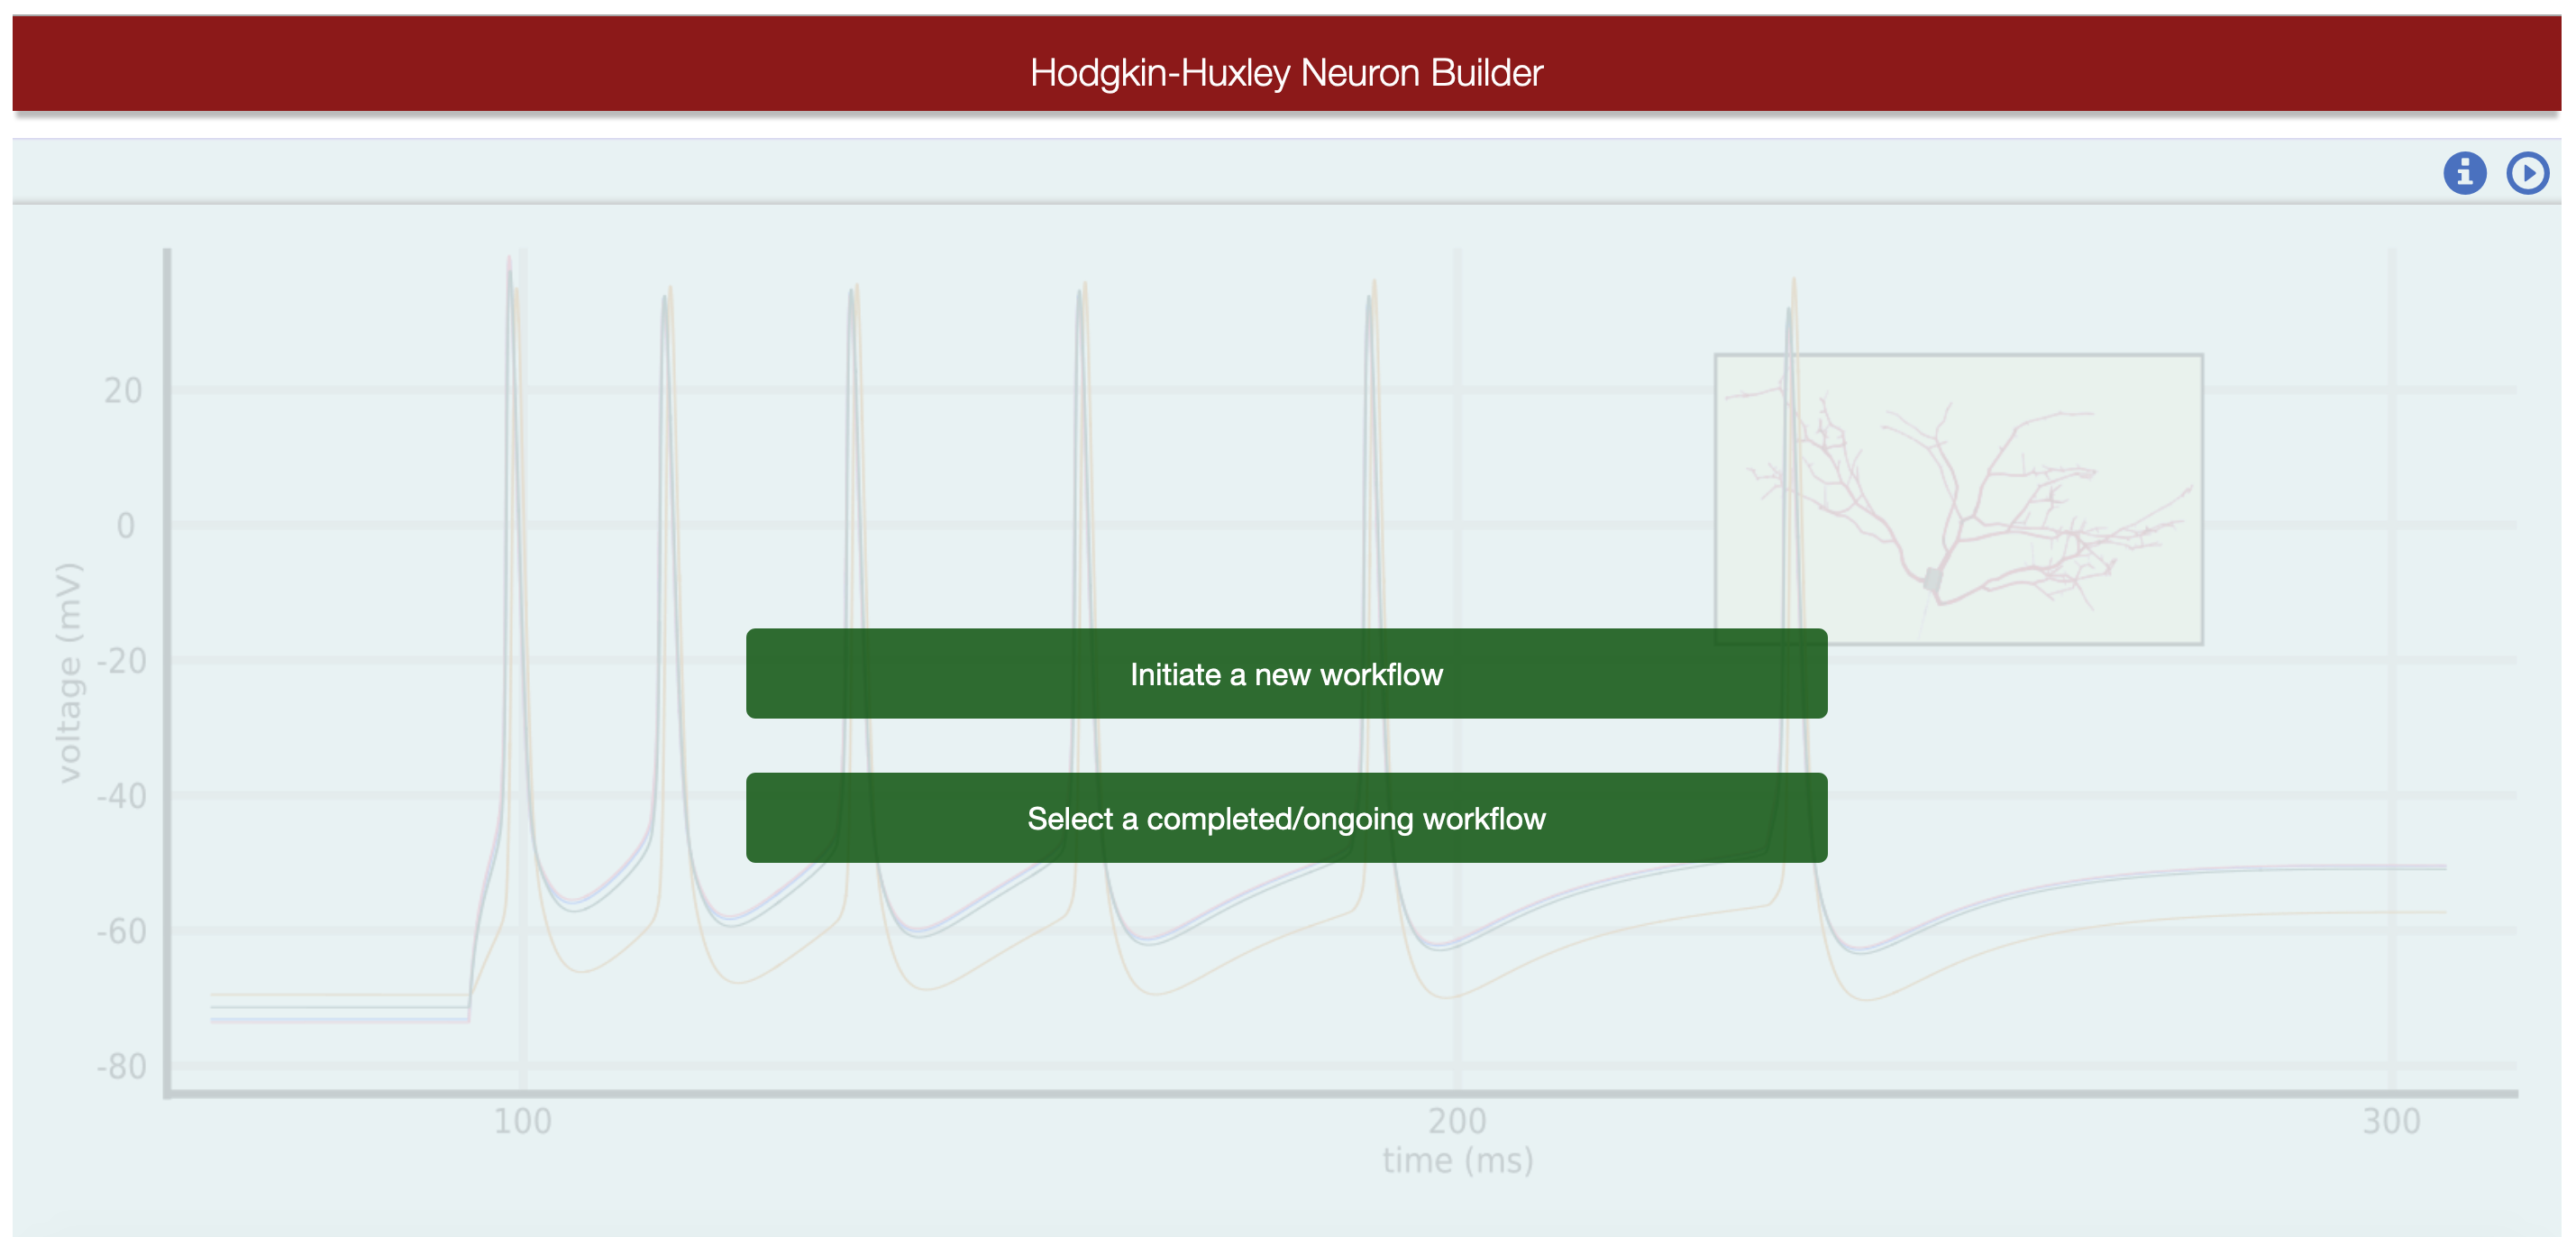
The web-application homepage (see figure below) allows the user to initiate a new workflow or to select a workflow previously saved in the current Collab storage.
After initiating a new workflow, the user is provided with two panels allowing to go through the processes of “Cell Optimization” and “Single Cell Simulation” respectively (see figure below).

Cell Optimization
The cell optimization is made up of two main steps: i) the feature extraction and ii) the choice of the single cell model to be optimized. An additional panel, the “Optimization settings” one, is provided for the insertion of the optimization parameters (see figure below).
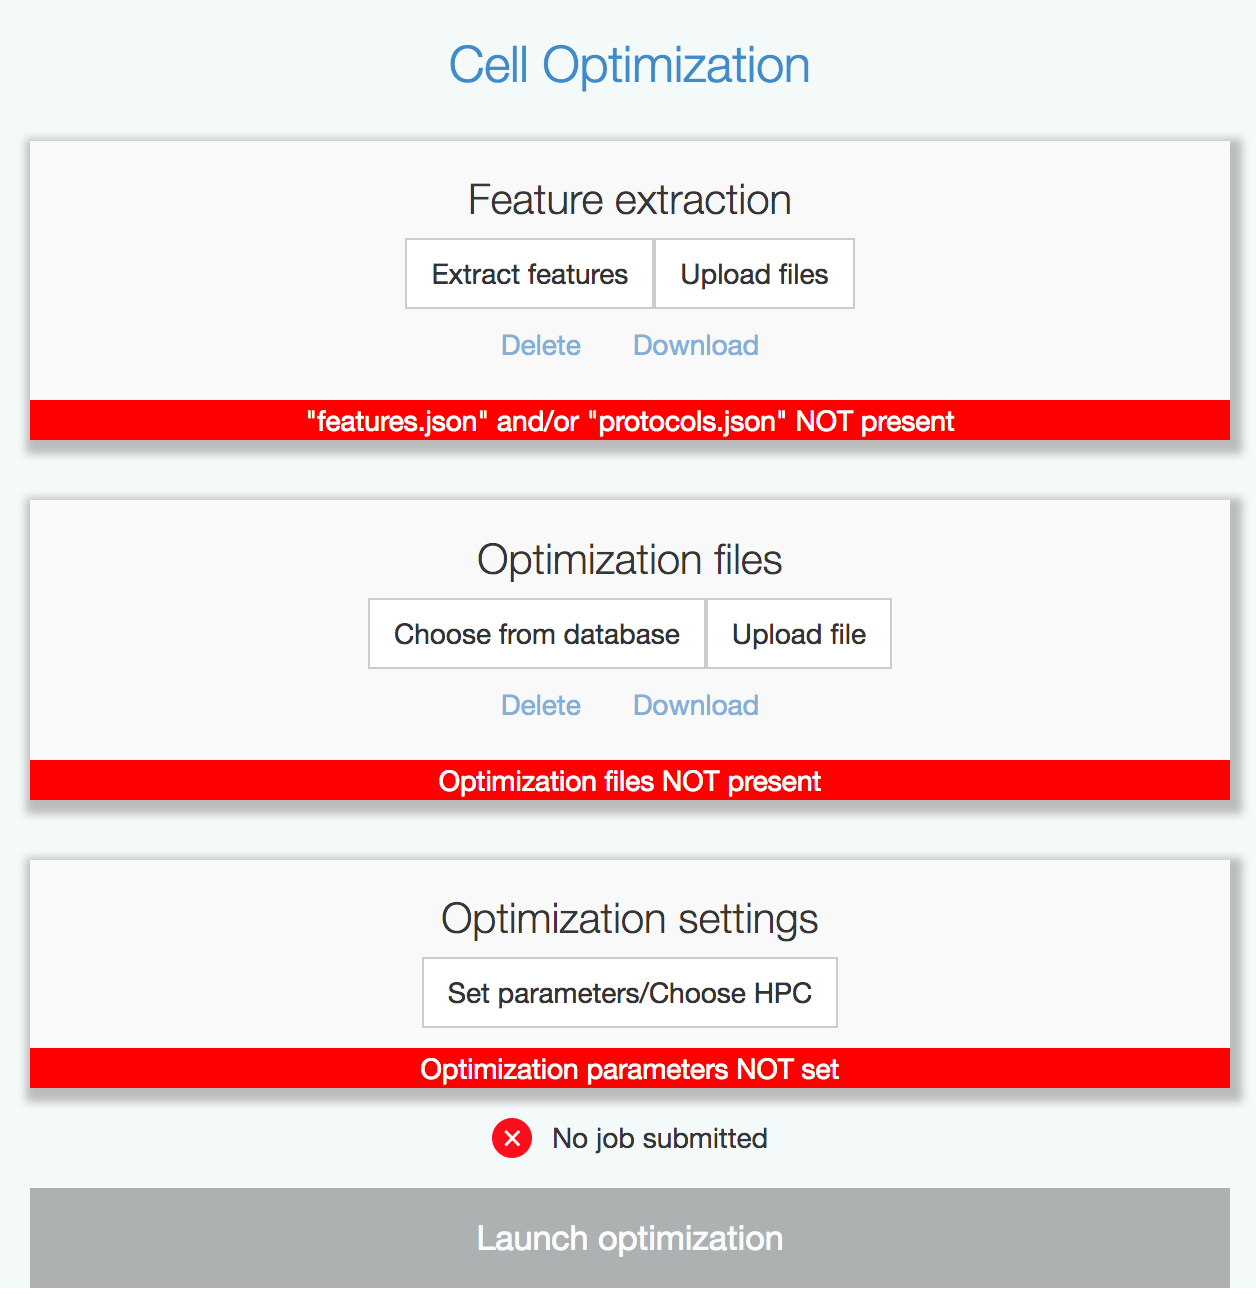
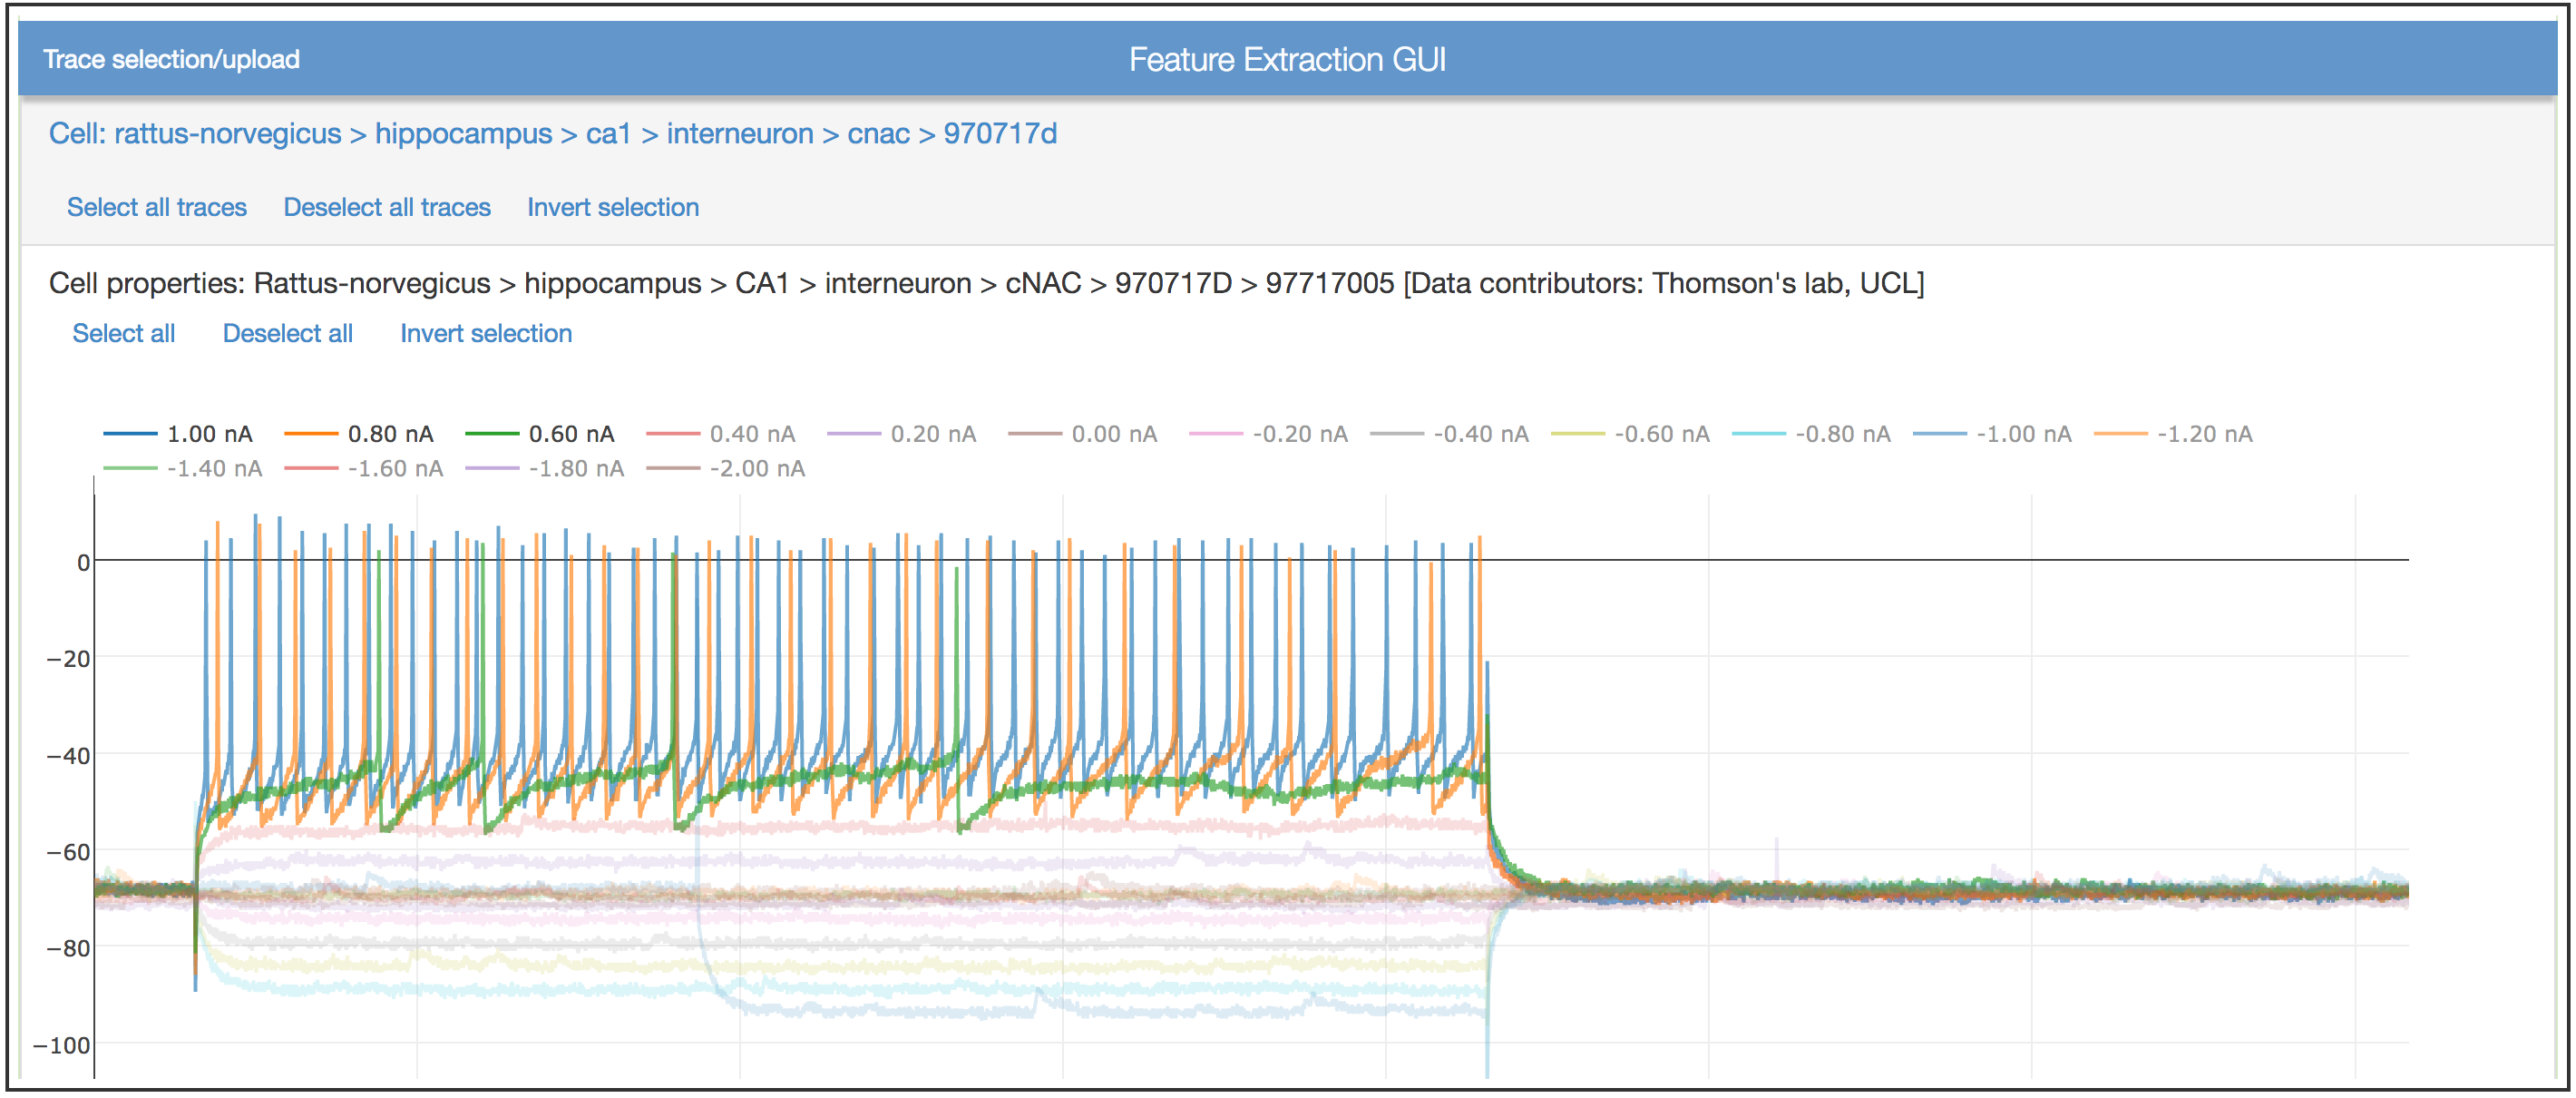
Feature extraction is performed through the Feature Extraction GUI web application when clicking the “Extract features” button. This application interacts with and is integrated into the Hodgkin Huxley Neuron Builder framework (as shown in the figure below) and allows the user to extract features of interest from a dataset of electrophysiological traces provided by HBP or from data uploaded by the user himself. For a detailed explanation of the Feature Extraction GUI, please refer to the dedicated page of this guidebook (Feature extraction). Alternatively, the user can upload his own features.json and protocols.json files through the “Upload files” button.
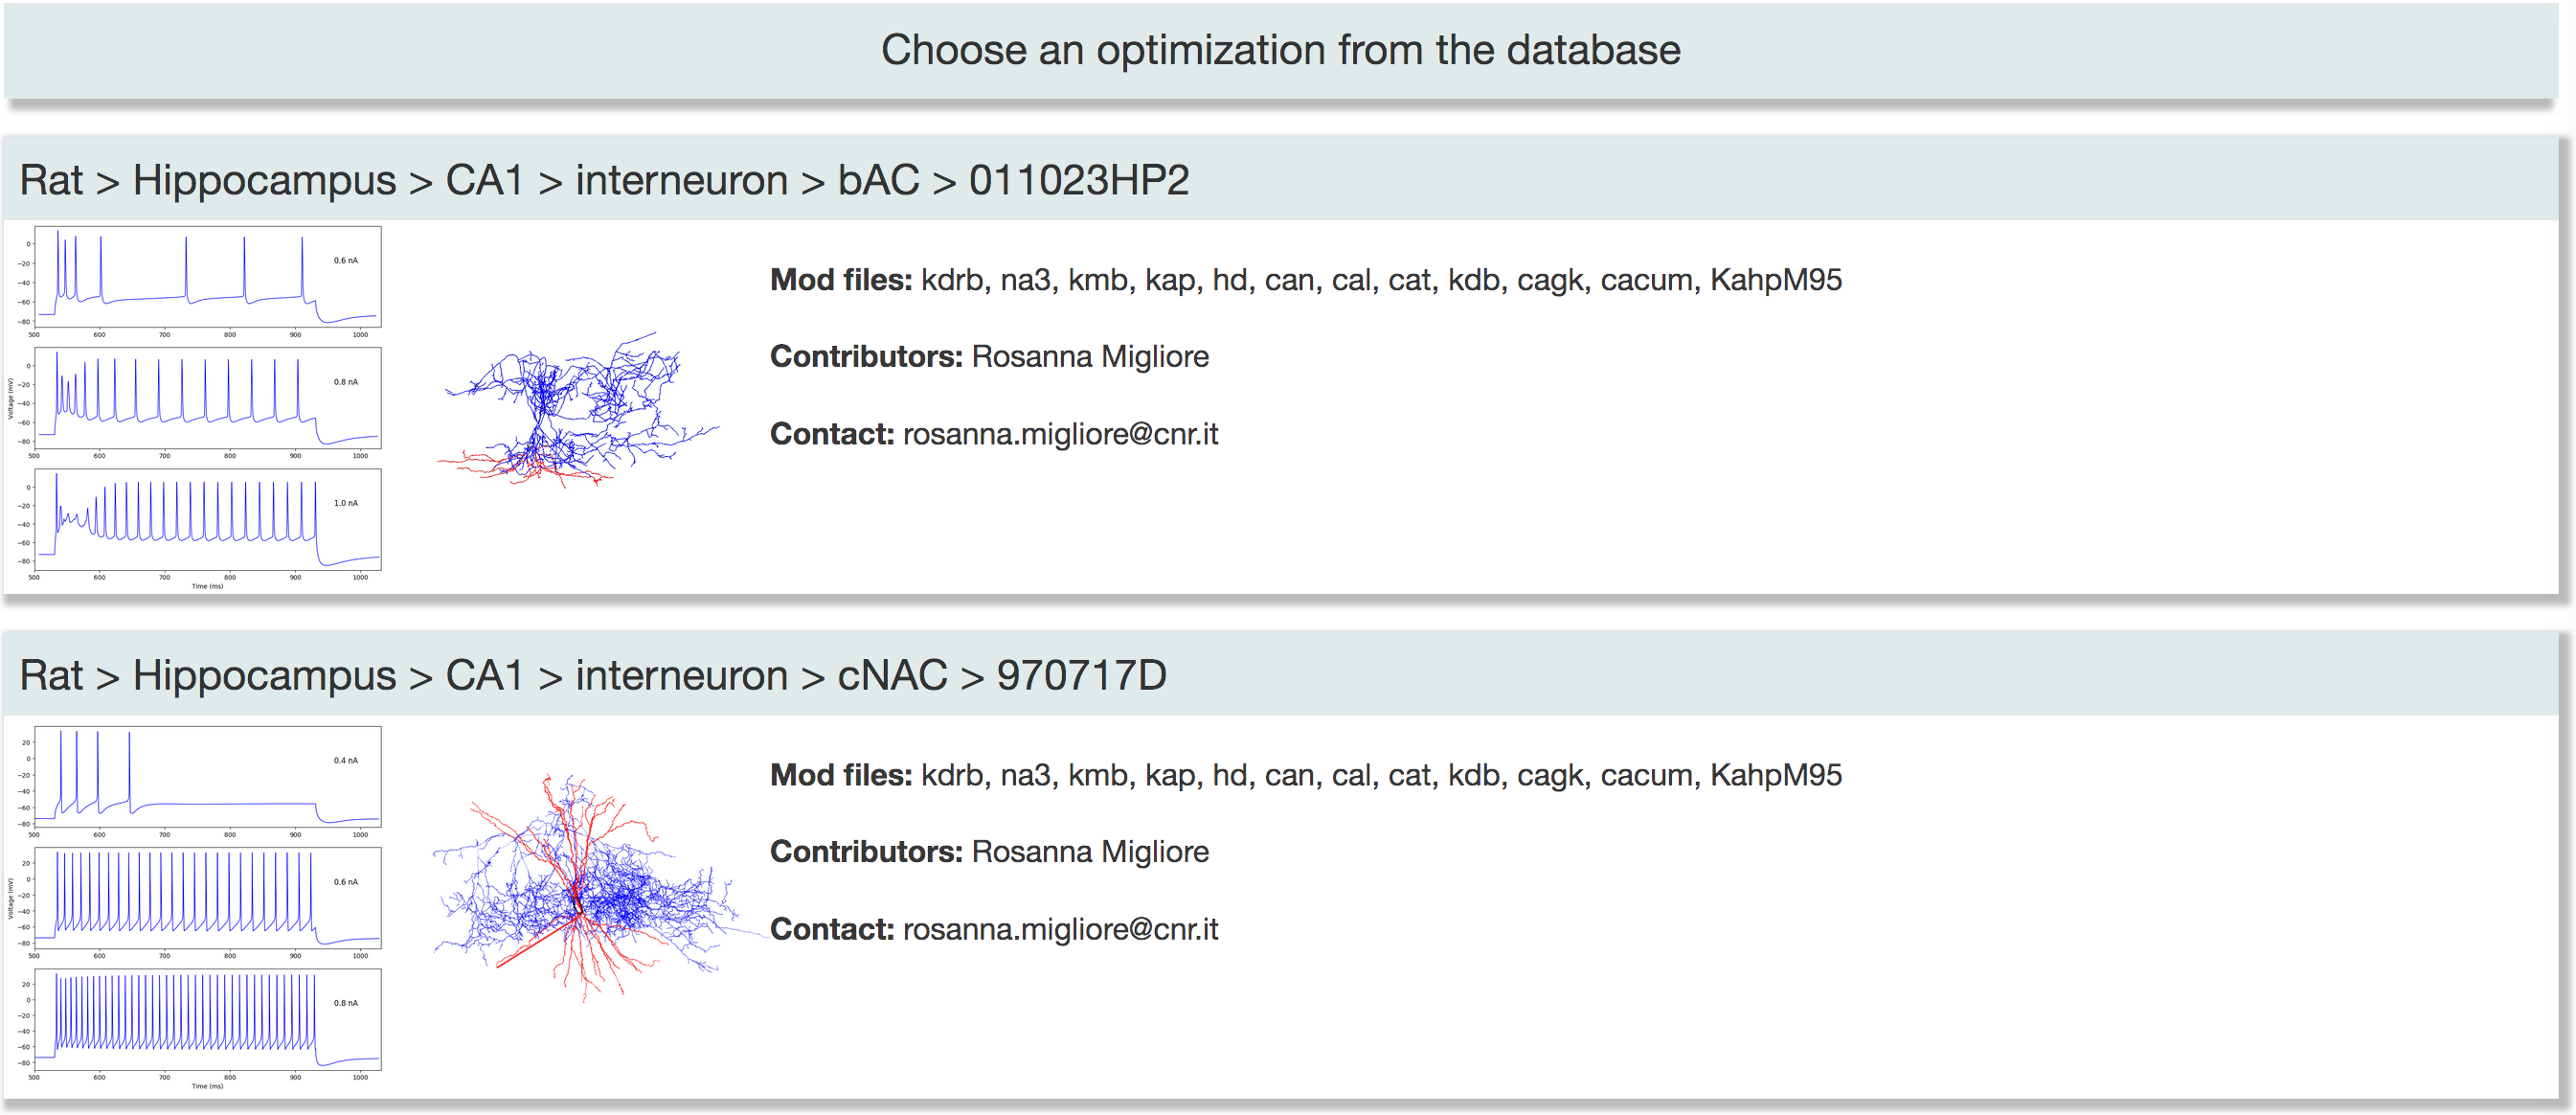
The model to be optimized is chosen among a dataset displayed to the user after clicking the “Choose from database” button. The dataset is made up of NEURON-based models. When choosing the model, the user is provided with two images representing the reconstructed morphology of the neuron and an example of the simulated activity of the model, after it has been optimized via a different set of electrophysiological features (see figure below). Based on the neuron/activity properties the user chooses a model which will be optimized by using the features extracted/uploaded in the previous step. The model parameters will be optimized via the BluePyOpt tool through an optimization procedure based on a genetic algorithm. For a complete reference to the BluePyOpt, please refer to the original article at this link. Alternatively, the users can also upload their own model to be optimized. This has to be appropriately formatted and compressed in a zip file. You can download an example .zip file at the following
link(please reproduce the same folder structure in the example file, including empty folders).
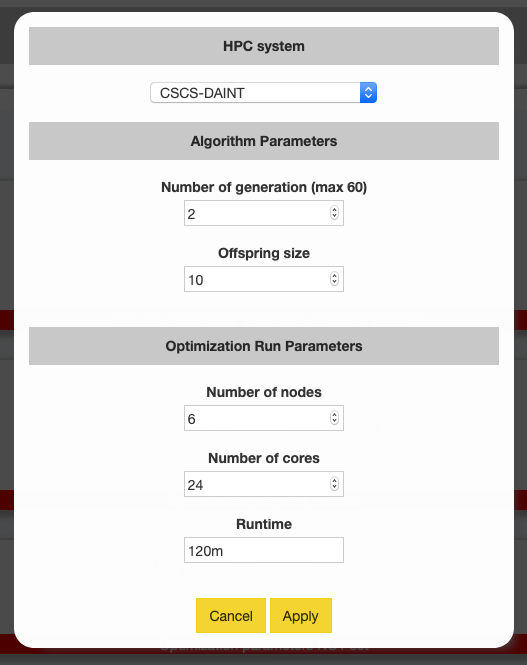
Before launching the optimization, the user must set the optimization parameters by clicking the “Set parameters/Choose HPC” button of the “Optimization settings” panel. A form is presented to the user (see image below), to be filled in with: i) parameters concerning the genetic algorithm, namely the maximum number of generations the user wants to adopt as well as the number of offsprings to be considered; ii) system parameters for the optimization run, namely the number of nodes and cores to be reserved on the HPC system and the maximum time the process is allowed to be running; iii) the HPC system to be used.
Once the feature files are present in the pipeline, the model chosen and the parameters set, the “Launch optimization” button is activated and the optimization can be launched (see figure below).

Upon successful submission, the flag icon is changed and the submission button deactivated to prevent a second submission with the same workflow id (see figure below).

Both the feature and the optimization files can be removed from the pipeline and/or downloaded by the user on his local machine through the “Delete” and “Download” buttons respectively.
The status of the submitted jobs can be monitored via the “Single Cell Simulation Run” panel (see next paragraph), through the “Fetch results” button.
Single Cell Simulation Run
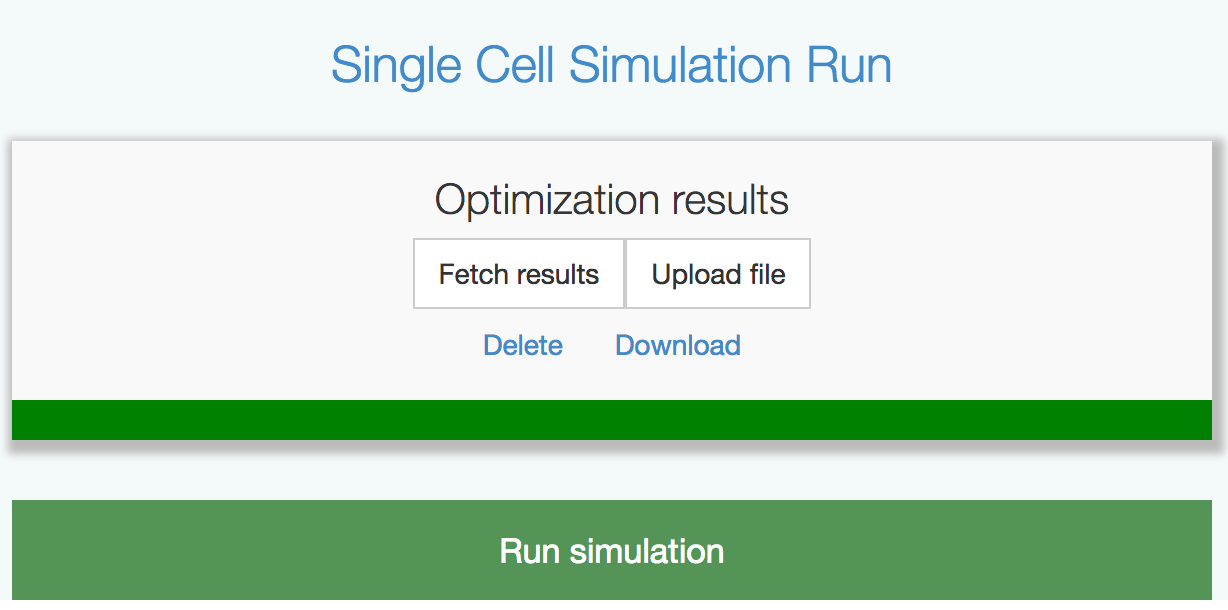
After successful termination of the optimization phase, the optimized model can be retrieved and used for simulations. This step is performed through the “Single Cell Simulation Run” panel (see figure below).
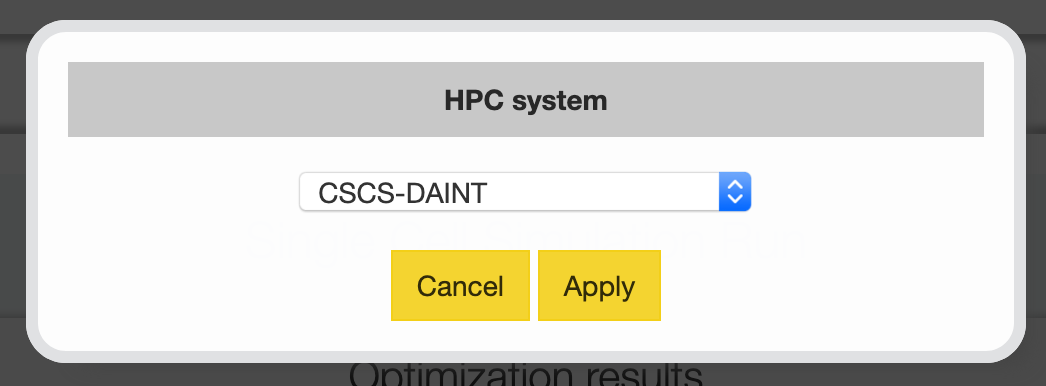
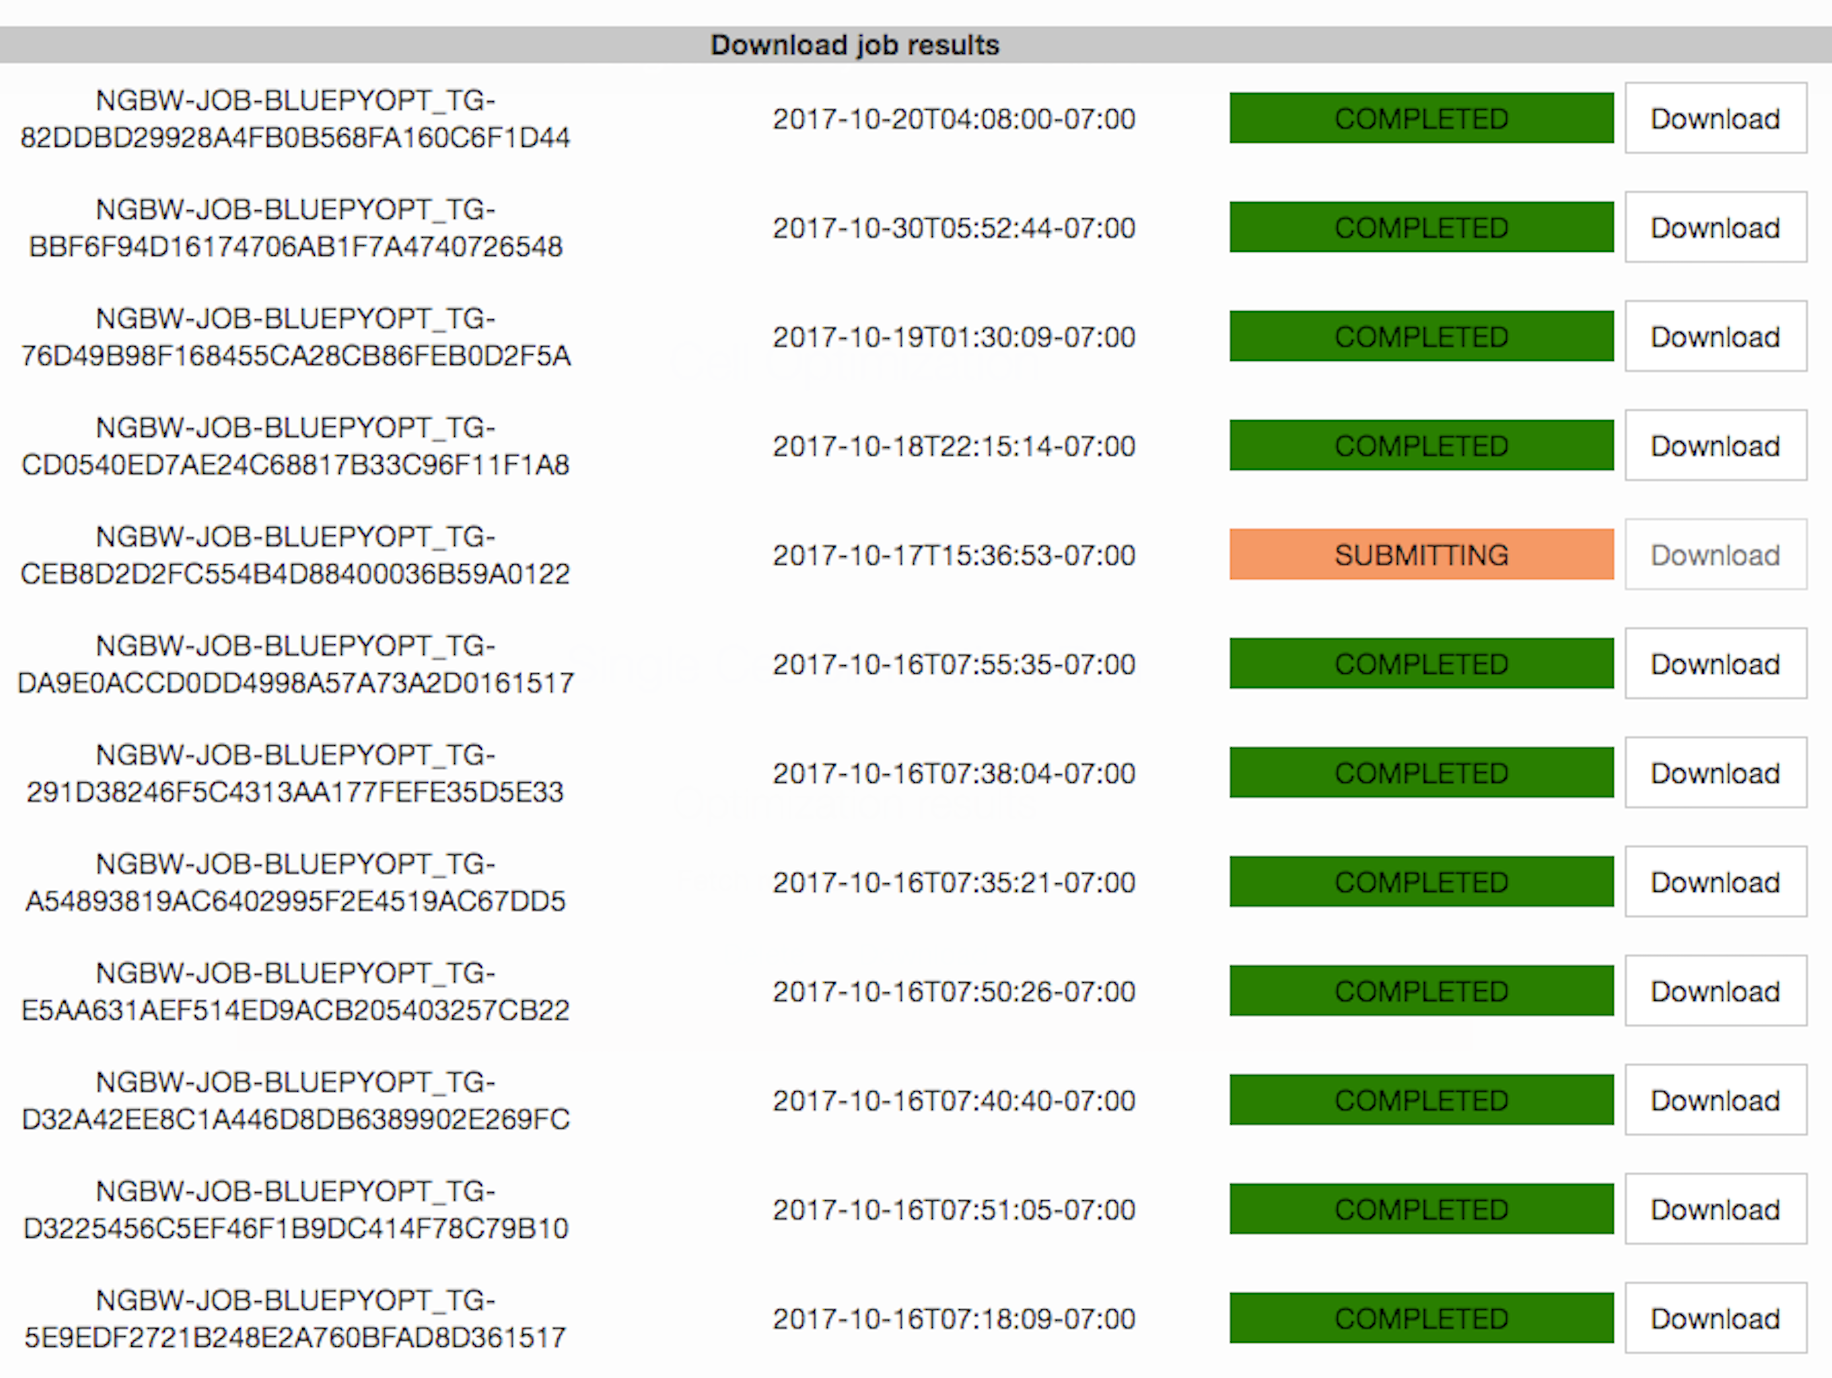
The user can fetch the results from the HPC system of choice through the “Fetch results” button which allows to select the HPC system the optimization files reside in and, successively, select the result file of interest (see figures below). At the moment, only the Neuroscience Gateway HPC system can be used for running the optimization scripts. A full description of the meaning of the job status tags can be found under this link. Please note that, while the job status can be “Completed”, the outcome of the optimization might be empty, if, for example, the optimization parameters are not chosen appropriately (e.g. if the “Runtime” value is set so as not to allow the optimization to come to an end).
Alternatively, the user can upload a .zip package containing the files needed for the simulation, through the upload button. For an example of how the .zip file content must be structured, please refer to the following link.
Once the model files are integrated into the pipeline, the simulation can be run by clicking the “Run Simulation” button. The model is fed to the “Neuron As A Service” web-application, integrated into the neuron builder (see figure below), which allows the user to visualize the morphology of the chosen model (both in 3D and as a dendogram) and set the simulation run parameters.
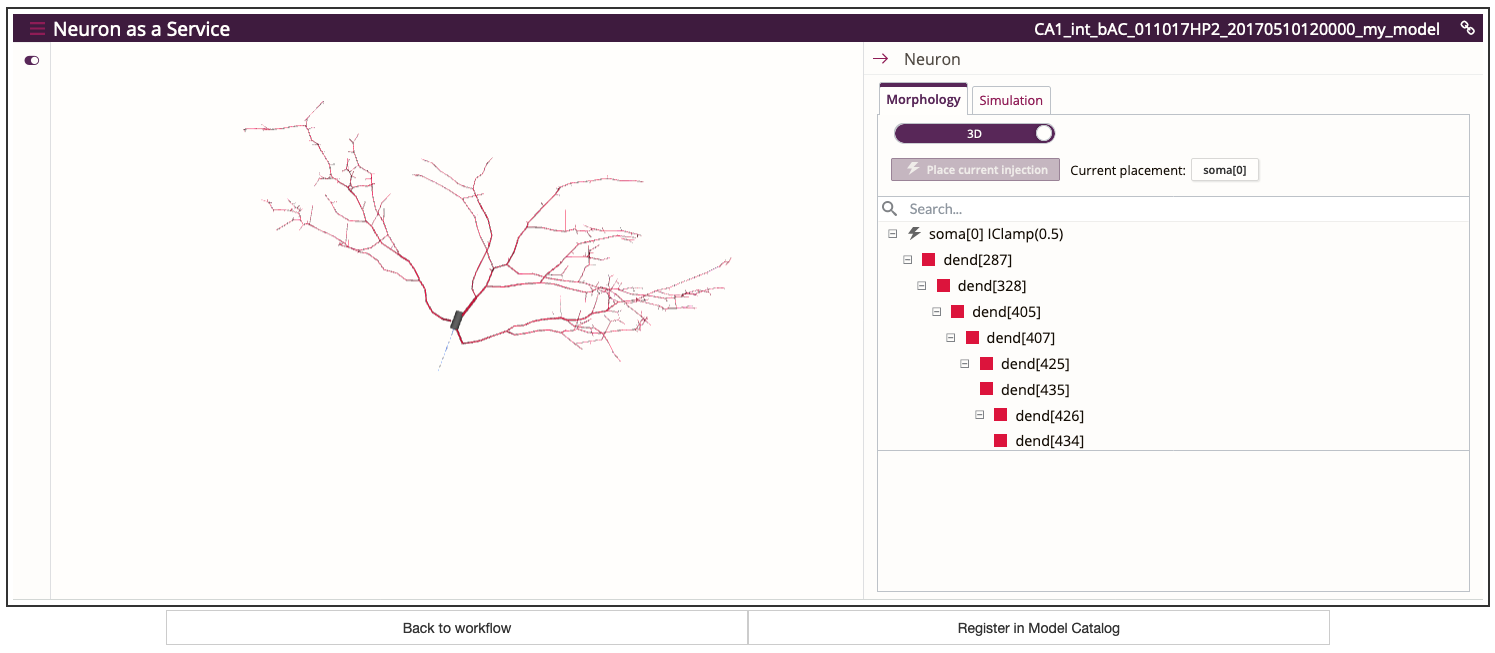
For further details on the “Neuron As A Service” application, please refer to the dedicated page of this guidebook (Single cell in silico experiments under current clamp).
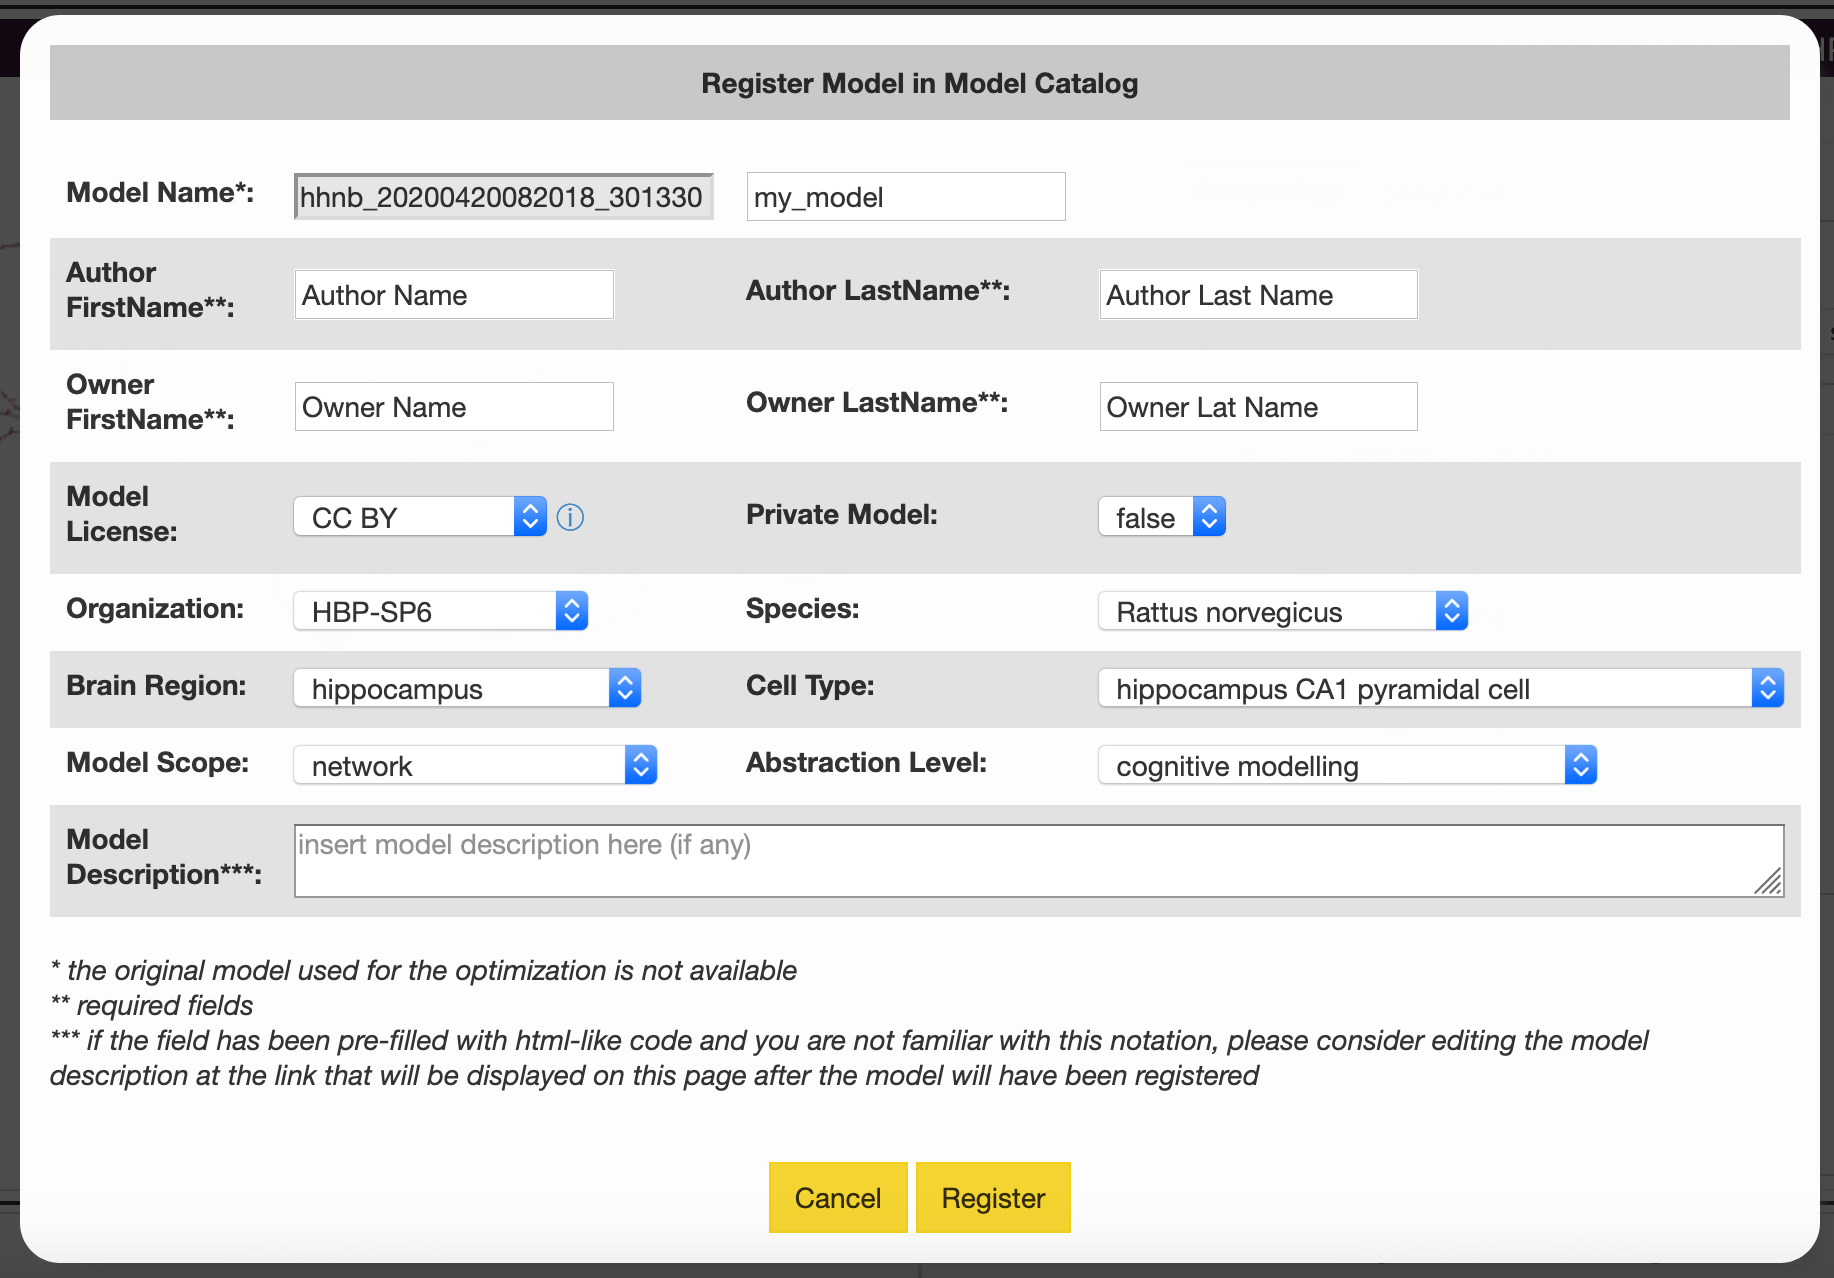
Adding model to the Model Catalog
Finally, the user can register the optimized model in the Model Catalog. From the simulation page, after clicking on the “Register in Model Catalog” button, a form will be displayed where the user will be able to insert the model’s metadata (see figure below). By clicking on the “Register” button, the registration process will be triggered, at the end of which the user will be provided with the Model Catalog URL of the optimized model.